Effortlessly Remove Salon Nails at Home with Our Creative Hands Removal Kit
- Catriona Holt
- Jun 10, 2023
- 3 min read


Are you tired of chipped polish or waiting for your next salon appointment to fix your nails? Look no further! We have the ultimate solution for busy women like you who need a quick and efficient way to remove salon nails. Our Creative Hands Removal Kit is here to revolutionize your nail routine and help you achieve flawless results in the comfort of your own home.
Step-by-Step Guide to Using Our Removal Kit:
Step 1: File Off Shiny Top Coat
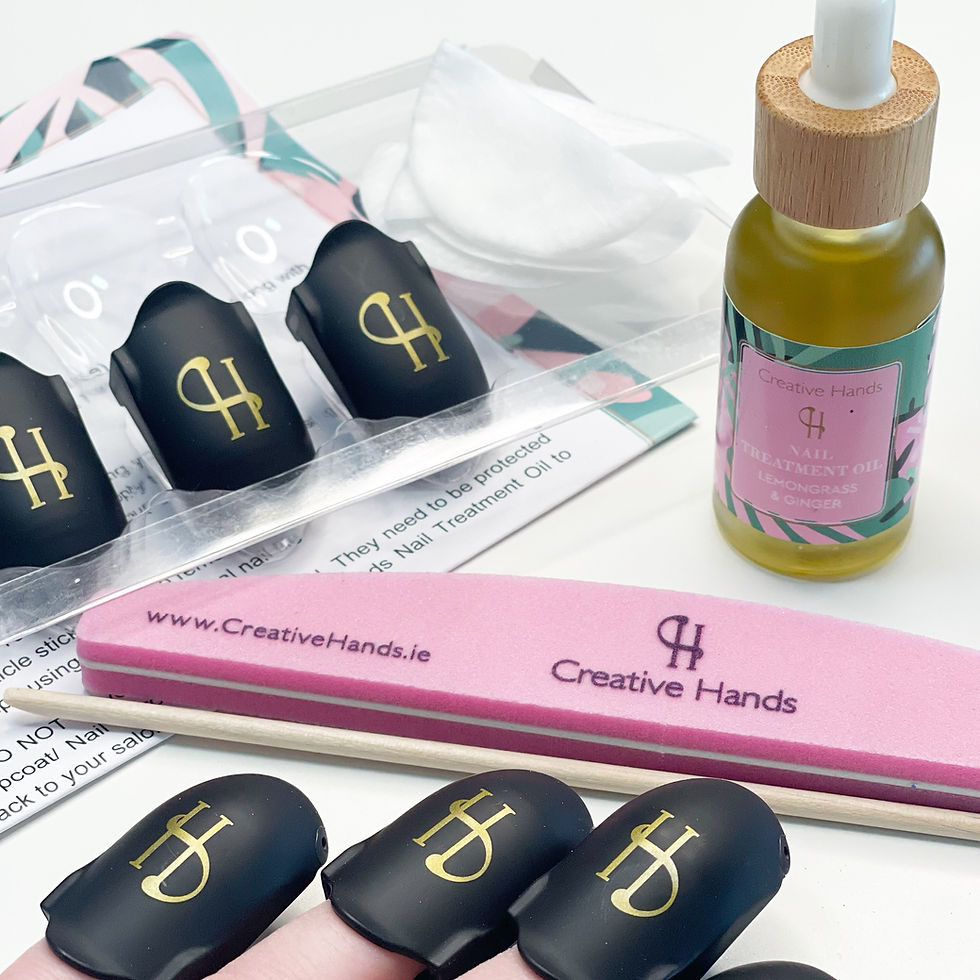
Start by using the double-sided nail file from our removal kit to gently file off the shiny top coat of your salon nails. This step allows the acetone to penetrate the layers more effectively, making the removal process faster and smoother.
Step 2: Soak Cotton Pad with Acetone
Take a cotton pad and soak it with acetone from our generous 250ml bottle included in the removal kit. Ensure the cotton pad is saturated but not dripping.
Step 3: Apply Cotton Pad and Secure with Clips
Place the soaked cotton pad directly on your nail, making sure it covers the entire surface. Now, take our specially designed Creative Hands Removal Clips and secure them in place, holding the cotton pad securely against your nail. These clips are designed for maximum comfort and effectiveness, ensuring that the acetone works its magic without any fuss.
Step 4: Allow Acetone to Work
Depending on the type of products used on your nails, allow the acetone to work its magic for approximately 10 minutes. The precise timing may vary, so keep an eye on the progress. You can use this time to catch up on your favorite TV show, do some light reading, or simply relax.
Step 5: Use Cuticle Stick to Remove Polish
After the acetone has had enough time to dissolve the salon nails, use the cuticle stick included in our removal kit to gently push off the loosened polish. The polish should come off easily, revealing your natural nail underneath.
Step 6: Buff Any Remaining Polish and Shape Nails
Take the buffer from our kit and gently buff any remaining polish residue from your nails. This step ensures that your nails are completely clean and smooth. You can also use the buffer to shape your nails to your desired length and style.
Step 7: Apply Cuticle Oil
Finish off the nail removal process by applying our nourishing cuticle oil. Our removal and repair kit includes a 30ml bottle of our specially formulated Nail Treatment Oil. Apply a small amount to each nail and massage it into your cuticles and nail beds. This step helps to hydrate and nourish your nails, promoting healthy growth and maintaining their natural beauty.
Conclusion:
With our Creative Hands Removal Kit, you have everything you need to effortlessly remove salon nails at home. Say goodbye to chipped polish or waiting for your next salon appointment. Follow these easy steps, and you'll achieve salon-quality results in no time. Grab your very own removal kit today and embrace the freedom to maintain your nails on your own terms.
Remember, our removal kit is perfect not only for scheduled removals but also for those unexpected nail emergencies. Stay prepared and keep your nails looking flawless anytime, anywhere.
Experience the convenience and efficiency of our Creative Hands Removal Kit and say hello to beautiful, well-groomed nails whenever you desire.
To get your hands on our removal kit and explore our other fabulous nail care products, visit our website or stop by our salon today!
Keep shining,
Catriona


Comments